Have you ever faced HDMI connectivity issues with your Hisense TV? I know how frustrating it can be when you’re all set for a movie night or an intense gaming session, only to be hindered by technical glitches. But why should these small problems get in the way of your entertainment? In this guide, I’ll walk you through some straightforward and effective troubleshooting steps to solve HDMI issues on your Hisense TV. From simple cable checks to comprehensive system resets, I’ve got all the tips you need to get back to enjoying your favorite shows and games without hassle. Stick with me, and let’s tackle these HDMI challenges together.
1. The Basics: Cable and Port Check:
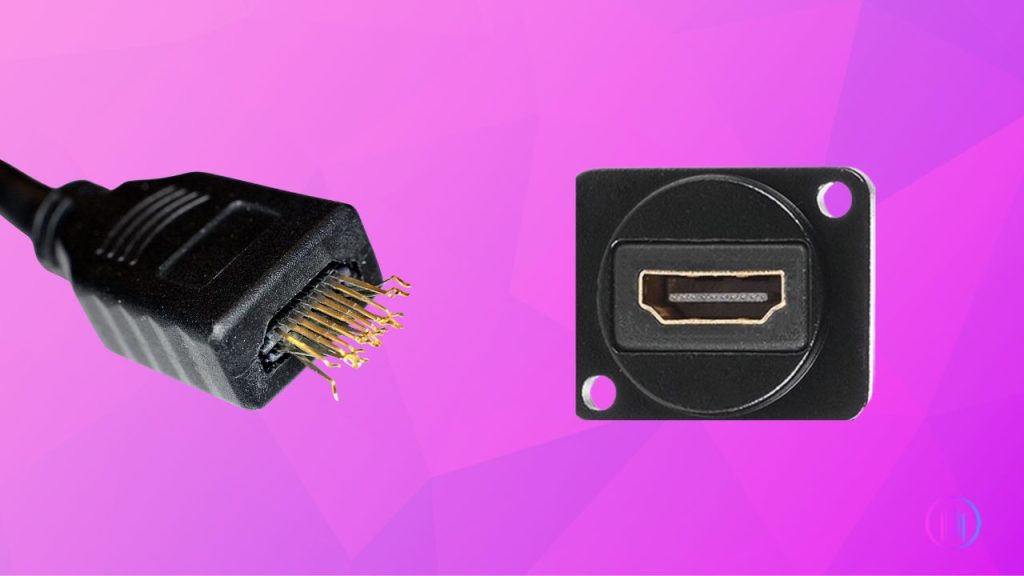
Begin by carefully examining your HDMI cable for any signs of wear or damage. A faulty cable is often the root cause of connectivity issues. Also, try connecting to a different HDMI port on your TV to rule out any port-specific problems. It’s important to clean these ports as well, as accumulated dust and debris can disrupt a good connection. If your TV has several HDMI ports, test each one to see if the problem persists only in a specific port.
2. Common HDMI Connectivity Issues:
Occasionally, a poorly seated cable can prevent your TV from detecting the device. This issue might stem from a broken HDMI cable, an HDMI port with damaged pins, or an HDMI connection that isn’t fully secure between the cable and the connector.To address this, switch off your TV, remove all cables, and clean the contacts using compressed air or by blowing gently on them. Firmly reseat the cables and switch the TV back on. If the issue persists, try a different HDMI input, preferably one located on a different part of the TV.
3. External Device Troubleshooting:
At times, the issue might not lie with your Hisense TV but rather with the external device you are attempting to connect, like a gaming console or a Blu-ray player.To figure out where the issue lies, try connecting the external device to a different TV or monitor. If the device works well with another screen, then your Hisense TV might need further troubleshooting. On the other hand, if the device still doesn’t work, it’s likely that the external device is at fault and needs attention.
4. Navigating TV Settings:
When facing HDMI issues on your Hisense TV, it’s crucial to ensure you’ve selected the correct HDMI input. This might seem basic, but it’s often overlooked. Navigate to your TV’s input settings using your remote control. Here, verify that the HDMI port connected to your device is the one selected on the TV. Additionally, for optimal viewing, especially with 4K or HDR content, delve into the HDMI settings of your TV. Adjust them according to the requirements of the content or device you’re using. This step can significantly enhance your viewing experience and may resolve connectivity issues.
5. The Power Cycle Technique:
Experiencing persistent HDMI issues with your Hisense TV? A simple but often effective solution is the power cycle technique.This approach means restarting your TV to get rid of small glitches or system errors that could be causing problems with the HDMI connection. It’s a straightforward process that can often resolve issues without needing more complex troubleshooting steps.
Here’s how to perform a power cycle on your Hisense TV:
- Turn off your Hisense TV using either the remote control or the power button directly on the TV.
- Next, unplug your TV from the wall or its power source. This step is crucial for the reset process to work effectively.
- Then, find the physical Power button on your TV, which is usually located beneath the infrared receiver.
- Hold down this power button for about 15 seconds. Doing this helps to discharge any remaining power in the TV and aids the reset process.
- After holding the button, leave your TV unplugged for approximately 10 minutes. This time allows any residual power or charge within the TV’s components to completely drain out, ensuring a thorough reset.
- Once the 10 minutes are up, plug your TV back into its power source.
- Finally, turn on your TV. You might notice a red light flashing once, which signals that the reset has been successful.
6. Software Updates: A Hidden Solution:
Updating the software of your Hisense TV can be essential in resolving HDMI issues. These updates often bring fixes and improvements that enhance your TV’s functionality and compatibility. To keep your TV operating with the latest features and security patches, here are the steps to check and update the software on different Hisense Smart TV models:
- Locate the settings wheel icon on your Android Hisense TV. This is typically found at the top right corner of your screen.
- Scroll down in the menu until you find the ‘About’ option.
- Tap on ‘About’ to open it.
- Inside the ‘About’ section, look for and select ‘System Software Update’.
- Once you select it, the TV will begin the update process. This should only take a few minutes to complete.
If you are using a different model of Hisense TV with an update method different from those described above, you can watch this video. It includes firmware update procedures for all Hisense TV models.
7. Check Your TV/Device HDMI Specifications:
When you connect a new device to your Hisense TV, it’s important to make sure that the HDMI standards of both the TV and the device are compatible. Modern Hisense TVs typically support HDMI 2.1, which is great for its backward compatibility and ability to handle advanced features like 4K resolution at 120Hz. However, if you’re using a device with HDMI 2.1 and your TV has an older version of HDMI, there could be some signal interpretation issues. In this case, the device might send a signal that the TV cannot fully process. To resolve this, you should check the HDMI specifications of your TV, the new device, and the connecting cable. If there’s a mismatch, adjusting the settings on the device you’re connecting to your TV can often fix the issue. This ensures smooth connectivity and the best viewing experience, regardless of the HDMI version your TV supports.
8. Hisense HDMI ARC Troubleshooting:
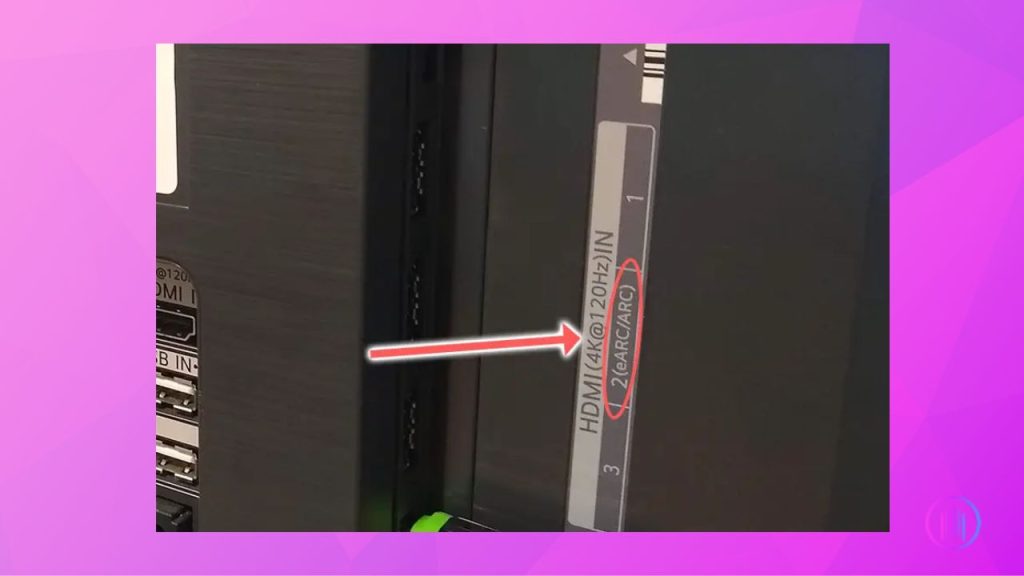
To improve your audio experience with external sound systems using your Hisense TV, you need to utilize the ARC (Audio Return Channel) feature. Here’s how you can set it up:
- Check the HDMI port on your Hisense TV for a label that says ‘ARC’ or ‘eARC’. Use this port for connecting to your sound system.
- Press the menu button on your TV remote (it might look like two or three lines) to open the TV menu.
- Go to the ‘Sound’ settings in the menu.
- In the ‘Sound’ settings, look for an option called ‘Audio Output’ and select ARC.
- Then, find ‘Advanced Settings’ in the menu.
- In ‘Advanced Settings’, set ‘Digital Audio Out’ to ‘Pass Through’.
- If there’s no sound from the HDMI ARC connection, check your external speaker or soundbar to make sure ARC is activated there. If it still doesn’t work, try changing ‘Digital Audio Out’ on your TV to ‘Auto’.
9. Factory Reset:
When HDMI issues persist despite trying all other troubleshooting methods, a factory reset on your Hisense TV might be the next step. This process will revert your TV to its original settings, erasing all personal configurations, removing downloaded apps, and signing you out of all accounts.
Here’s how to perform a factory reset:
- Press the ‘Home’ button on your remote to open the TV’s main menu.
- In the main menu, go to the ‘Settings’ section, identifiable by a gear icon.
- Scroll down in the settings to find and select ‘Device Preferences’.
- Keep scrolling down in ‘Device Preferences’ until you reach the bottom where the ‘Reset’ option is located.
- Choose ‘Reset’. Remember, this will erase all your data and settings, making your TV like new.
- Then select ‘Reset Everything’ and press ‘OK’ button on remote to comple reset.
- Once the reset is done, the TV will restart. You’ll have to set it up again, beginning with selecting the language, similar to when you first got the TV.
Conclusion
Dealing with HDMI problems on your Hisense TV can indeed be challenging, but don’t lose hope! Most of these issues can be effectively tackled with the troubleshooting steps we’ve outlined. Remember, patience and a bit of effort often lead to success. If, however, you find yourself still struggling with persistent HDMI troubles, don’t hesitate to reach out for help. Contacting Hisense customer support or consulting a skilled technician can provide you with the additional assistance you need. Technology can be tricky, but with the right approach and a little help, you can get back to enjoying your favorite shows and games in no time!

I’m Shaun Conroy, an audiophile & founder of HiFi Audios. Holding a Bachelor’s in Sound Engineering, I bring deep expertise in audio devices and offer insights & recommendations to fellow enthusiasts.