Have you ever found yourself deeply engrossed in your favorite tune, only to have your immersion broken by the sudden silence of your left earbud? I know the feeling all too well. JLab GO Air Pop earbuds, while renowned for their ease of use and quality sound, aren’t immune to this perplexing issue. Picture this: you’re on an important call or lost in the beats of your beloved song, and unexpectedly, your left earbud goes mute. In these moments, I often wonder, how can we swiftly resolve this without letting frustration set in? In this article, I’m going to walk you through some simple yet effective strategies I’ve discovered to get your JLab GO Air Pop’s left earbud up and running again.
Notable Points
- Ensure both earbuds are charged and powered on. Sometimes, issues can arise if the earbud is not correctly placed in the charging case or is manually turned off.
- To determine if the issue is with the earbuds or your device, pair the earbuds with a different device and check if both work.
- Let the non-working earbud drain its battery completely, then recharge it fully. This can reset its functionality.Dirt and debris can affect performance. Clean the earbuds, especially the charging port and speaker grills, using a cotton swab or soft brush.
- Follow the manufacturer’s instructions to reset your JLab earbuds. This often resolves connectivity or pairing issues.
- Make sure both earbuds are correctly placed in their respective slots in the charging case for effective charging.
- Inspect the earbuds for any visible damage that might affect their functionality. If damaged, consider contacting JLab for support or replacement.
Fixing JLab GO Air Pop Left Earbud Not Working
When I found my JLab GO Air Pop’s left earbud not working, I realized the fix is often straightforward. I start by checking the basics power status and connection. In my experience, a simple reset or ensuring the earbuds are fully charged usually solves the problem. I’ll walk you through some practical steps I follow for a quick fix, without any complicated jargon.
1. Checking Power Status of Each Earbud:
Begin by confirming that both earbuds are active. It’s common for issues to arise simply because the left earbud is either accidentally deactivated or not correctly placed in its charging case.JLab GO Air Pop earbuds are designed for ease of use, automatically turning on when removed from their case and syncing with each other before entering pairing mode. Once you’re finished using them, just place them back in the case and shut it; they’ll switch off on their own. This automatic power feature eliminates the need for manual turning on and off, simplifying their operation.
However, there’s also a manual power option for both earbuds, and it’s possible that one earbud might be manually turned off, leading to only one functioning earbud.
To ensure both are powered on when you find only one working, follow these steps:
- Place both earbuds back into the charging case, checking for charging indicators.
- Close the case for at least 10 seconds, then reopen it.
- Remove the earbuds, and wait for the LED indicators: one earbud should flash blue and white, while the other shows a solid blue light (depending on the model, both might flash blue and white), signaling pairing mode.
- Connect them to your device and check if both are operational.

In case one earbud still isn’t working, try these manual reset steps:
- Disable Bluetooth on your device and insert both earbuds in your ears.
- On the functioning earbud, hold down the touchpad (or button, depending on the model) for 3-5 seconds until you hear a tone or a ‘Goodbye’ prompt, indicating it’s turned off.
- Repeat the process with the other earbud. If it was off, you should hear a ‘Hello’ or ‘Ready to pair’ prompt, indicating it’s now on.
- If the non-functioning earbud turns off, turn it back on until you hear the ‘Hello’ prompt.
- Remove the earbuds and place them close together. They should start flashing white, trying to connect.
- When paired successfully, one earbud will flash blue and white, and the other will be solid white (or both flashing blue and white in some models), showing they’re in pairing mode.
- Reconnect the earbuds to your device and check if both are functional now.
By following these steps, you reset the earbuds and re-established their connection to your device. If one earbud is still not responsive, it’s time to explore the next troubleshooting step.
2. Trying the Earbuds with Another Device:
Curious if it’s your device or the earbuds? Let’s find out! It’s rare, but sometimes the device you’re using could be the mischief-maker, especially if both earbuds are alive (yes, powered on!) but only one sings.
Time for a quick detective game: Pair those earbuds with another device. Here’s how you play it cool:
- First, turn off Bluetooth on the currently connected device. Watch as your earbuds slip into a ‘let’s pair up’ mode.
- You’ll know they’re ready to mingle when one bud winks at you with blue and white lights, and its twin glows with a steady white light.
- If they both start crooning in harmony with the new device, bingo! The issue was your original device. Dive into its audio settings or hit up the user manual or the brand’s website for some troubleshooting gold.
- But hey, if one earbud still plays the silent game, it’s likely the earbuds playing tricks.
Remember, it’s all about finding who’s not playing nice the earbuds or your device.
3. Power Cycling the Earbuds, Discharge and Recharge:
Sometimes, an earbud might seem to have power but refuses to play any sound. If you’ve tried everything and it still isn’t working, here’s a different approach: let the problematic earbud stay on until its battery drains completely and it turns off on its own.
After it powers down, place it back in its charging case. It’s crucial to give it a full charge for about two hours, even if it doesn’t immediately show signs of charging. Patience is key here.
Once the charging time is up, take the earbuds out. If they both switch on, go ahead and reset them following the manufacturer’s instructions. After resetting, reconnect them to your device.
4. Clean the Earbuds Properly:
Accumulated dirt and debris are common culprits behind the malfunctioning of your JLAB earbuds. This grime, especially when clogged in crucial areas like the charging port and speaker grills, can disrupt connectivity and even lead to a total sound blackout.If you’re facing issues with one of your JLAB earbuds, a thorough cleaning might just be the solution you need.
Here’s a step-by-step guide to effectively clean your earbuds:
- Start your cleaning mission by examining these critical areas. A cotton swab or a soft brush is your best ally in gently dislodging any visible dirt or debris.
- Noticed any stubborn dirt in the charging port? Carefully use a toothpick to pry it out. However, be gentle to avoid any damage to the sensitive components.
- The ear tips can gather quite a bit of dirt. Detach them gently and give them a good wash with mild soap and water. Ensure they are completely dry before reattaching them to your earbuds.
- Once your earbuds are spick and span, place them back in their charging case. Allow them to charge uninterrupted for at least 20 minutes.
After completing these steps, give your earbuds another try. If the problem persists, it might be time to explore other troubleshooting methods.
5. Reset the Earbuds:
Experiencing issues with your JLab GO Air Pop earbuds? A quick reset often does the trick. Here’s how to reset them, whether you have the first-generation JBuds Air True Wireless Earbuds or another JLab model. If these steps don’t match your model, JLab’s support website is your go-to for specific instructions.
Resetting First-Gen JLab Air Earbuds
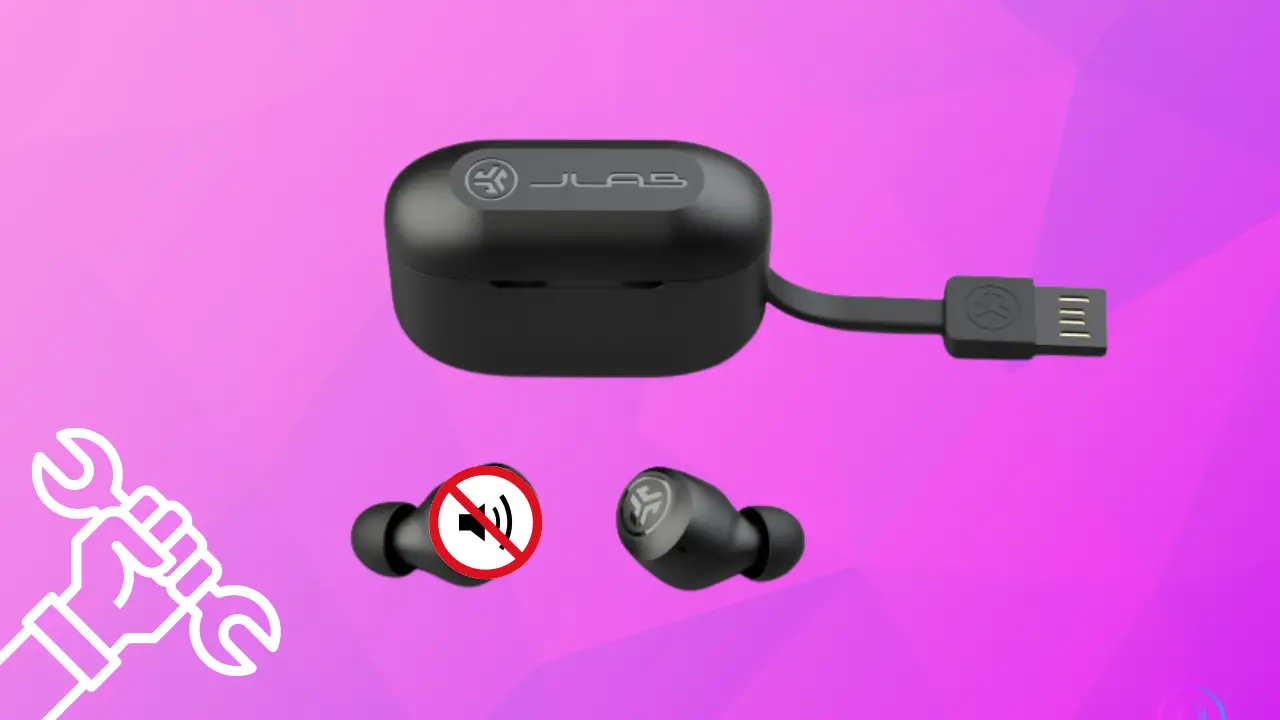
- Start by ‘forgetting’ the earbuds in the Bluetooth settings of your source device.
- Press and hold the multifunction button or touchpad on each earbud for three seconds until you hear ‘Goodbye’, indicating they are powered off.
- Now, press and hold the button on both earbuds for fifteen seconds. You’ll notice the LEDs stop flashing and turn solid white.
- Place the earbuds within two inches of each other and wait for about ten seconds for them to automatically reconnect.
- Once they’ve paired, the right earbud will flash blue and white, and the left one will be solid white, indicating they are ready to pair with your device.
Resetting Process for Most JLab Earbuds
- As before, start by removing the earbuds from your device’s Bluetooth memory.
- Insert the earbuds into their charging case, ensuring they indicate charging.
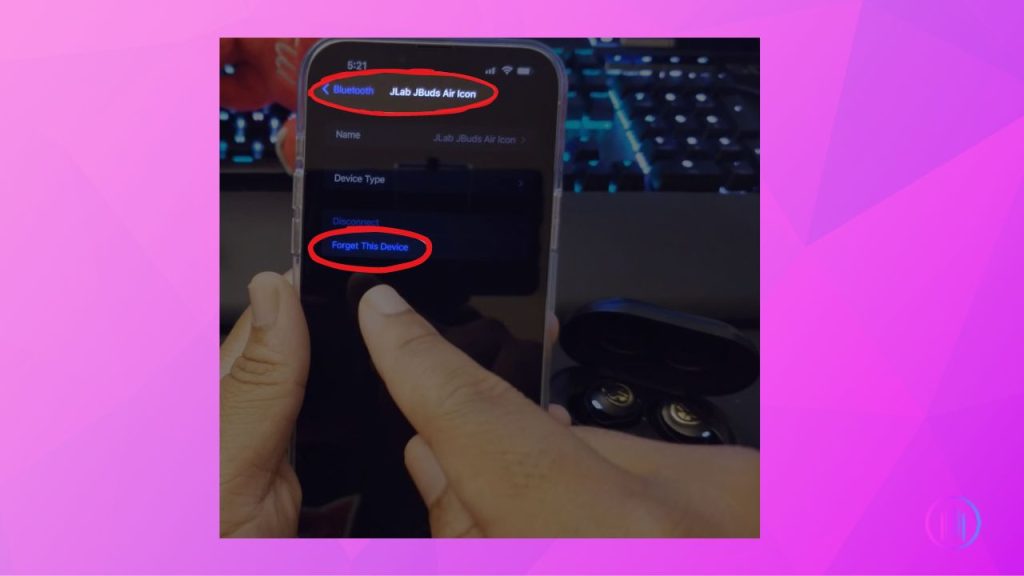
- Tap the touchpad on one earbud seven times (or four times, for some models). You’ll see the LED blink blue three times.
- Do the same for the second earbud, keeping them in the case.
- Remove the earbuds from the case, place them close to each other, and wait for ten seconds. They will enter pairing mode, indicated by one earbud flashing blue and white, and the other showing a solid white light.
Key Notes: Sometimes, getting your JLab earbuds back in sync might require more than one reset attempt, so patience is key. Also, ensure to turn off Bluetooth on other devices in the vicinity. This step helps to prevent any potential interference, ensuring a smoother reset and reconnection process for your earbuds.
If you’re a Gen 2 user looking for guidance on resetting your earbuds, the video below can be a great help. It offers a clear, step-by-step tutorial specifically for the Gen 2 model, making the reset process easier to understand and follow.
6. Ensuring Proper Charging for Both Earbuds:
It’s important to note that JLab earbuds are designed for independent usage. This means you might often use one earbud while the other rests in the charging case or is switched off. As a result, you could find that one earbud is fully charged while the other is depleted.Let’s get started with these easy steps:
- Always place the earbuds in their respective slots in the charging case. It’s easy to mix them up since they fit into either slot. However, for effective charging, it’s crucial to place the right earbud (marked ‘R’) in the right slot and the left earbud (marked ‘L’) in the left slot.
- Ensure each earbud is snugly fitted in its designated slot. A misaligned earbud won’t charge properly. The earbuds are typically labeled, so use these indicators as a guide.
- Once the earbuds are in place, check if they are charging correctly. Your user manual can provide specific details on how your JLab buds indicate they are charging (usually through a light indicator).
- Don’t forget the case itself needs to be charged too! The earbuds rely on the case for power, so a depleted case means no charging for the earbuds.
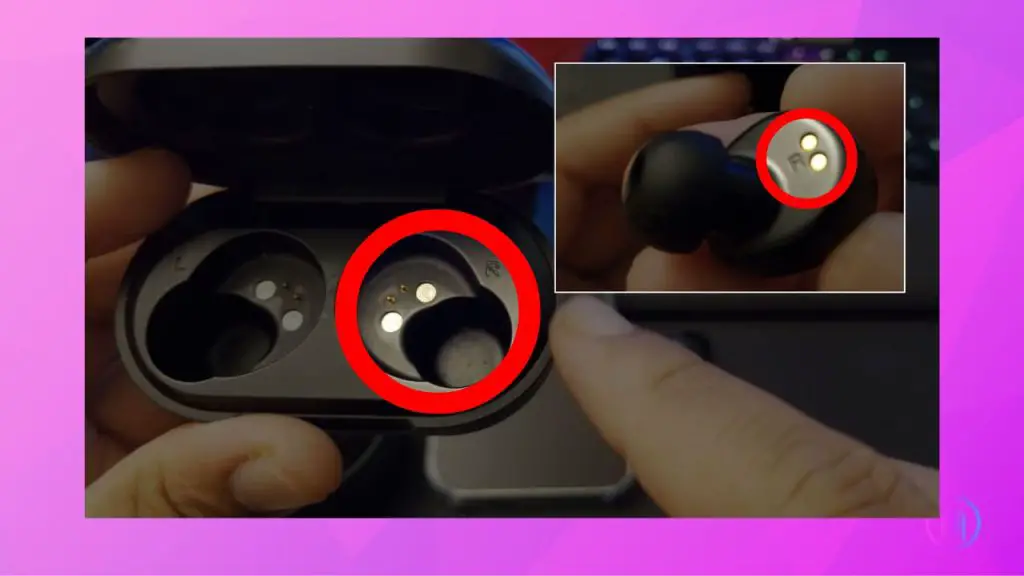
- If an earbud doesn’t charge, inspect the contact points. Both the earbuds and the case should be free of dirt or lint, especially around the charging pins.
7. Assessing for Damage or Defects:
Carefully examine your earbuds for any physical signs of damage. Common indicators include cracks, loose components, or visible wear and tear. Even subtle defects can impact their functionality. If you discover any damage, replacement might be necessary. Remember, earbuds are delicate gadgets; handling them gently can prevent many issues. For persistent problems, consider reaching out to JLab for support or to explore warranty options. Keeping an eye out for damage helps ensure long-lasting enjoyment of your music experience.
Contact Customer Support
If your efforts to fix the left earbud don’t bear fruit, don’t worry. It’s time to reach out to JLab’s Customer Support. They’re equipped to offer professional help and can guide you through more specific solutions. This step is especially vital if you suspect a manufacturing flaw or need to inquire about warranty coverage. JLab’s team is known for their friendly assistance and commitment to ensuring your listening experience is seamless and enjoyable. Remember, seeking expert help is often the quickest path to solving technical hiccups.
Final Thoughts
If your left JLab GO Air Pop earbud isn’t working, it can be quite a hassle. But don’t worry, you can often fix it with these simple steps. Remember to keep your earbuds clean and handle them with care to prevent issues. And if everything you’ve tried doesn’t work, JLab’s customer support is always there to assist. Wishing you the best of luck and hoping you enjoy your music hassle-free!

I’m Shaun Conroy, an audiophile & founder of HiFi Audios. Holding a Bachelor’s in Sound Engineering, I bring deep expertise in audio devices and offer insights & recommendations to fellow enthusiasts.