
Why won’t your Beats Solo 3 headphones turn on? It’s a problem that can really mess up your plans, especially if you were just about to listen to some tunes or needed to make a call. This guide is all about finding out what’s wrong and fixing it. We’ll look at everything from charging issues to more complicated stuff like hardware problems. Our goal is to keep things easy to understand and help you fix your headphones so you can get back to your music or calls without too much trouble.
Key Takeaways
- Insufficient battery charge is a primary reason why Beats Solo 3 headphones may not turn on. Regular use without adequate charging can deplete the battery, preventing the headphones from powering up.
- Your Beats Solo 3 might not turn on because of faulty or incompatible charging cables and adapters, which can lead to inadequate charging and contribute to power issues with the headphones.
- Software-related problems within the headphones can cause them to freeze or malfunction, preventing them from turning on. These issues can often be resolved through a reset.
- Your Beats Solo 3 might not turn on because of dirt, dust, or debris accumulating around the power button, obstructing its functionality and making it difficult or impossible to turn the headphones on.
- Over time and with repeated charging cycles, the lithium-ion battery in Beats Solo 3 headphones can degrade, reducing its ability to hold a charge and power the device.
- Out-of-date firmware can lead to compatibility and performance issues, potentially preventing the headphones from turning on or functioning correctly.
- Physical damage from drops, water exposure, or general wear and tear can harm the internal components, such as the circuit board, leading to power issues.
Fixing Beats Solo 3 Not Turning On Issues
Let’s address common challenges that may stop your Beats Solo 3 headphones from powering on. You’ll find solutions for everything from battery troubles to software hiccups, complete with clear, step-by-step instructions to help you resolve these issues.
1. Checking Battery Levels in Beats Solo 3:
Low battery is a common culprit when your Beats Solo 3 headphones refuse to power on. This issue stems from the device’s reliance on a rechargeable battery, which necessitates regular charging to maintain optimal performance and ensure extended listening sessions. To prevent this inconvenience, it’s crucial to regularly monitor your headphones’ battery level.
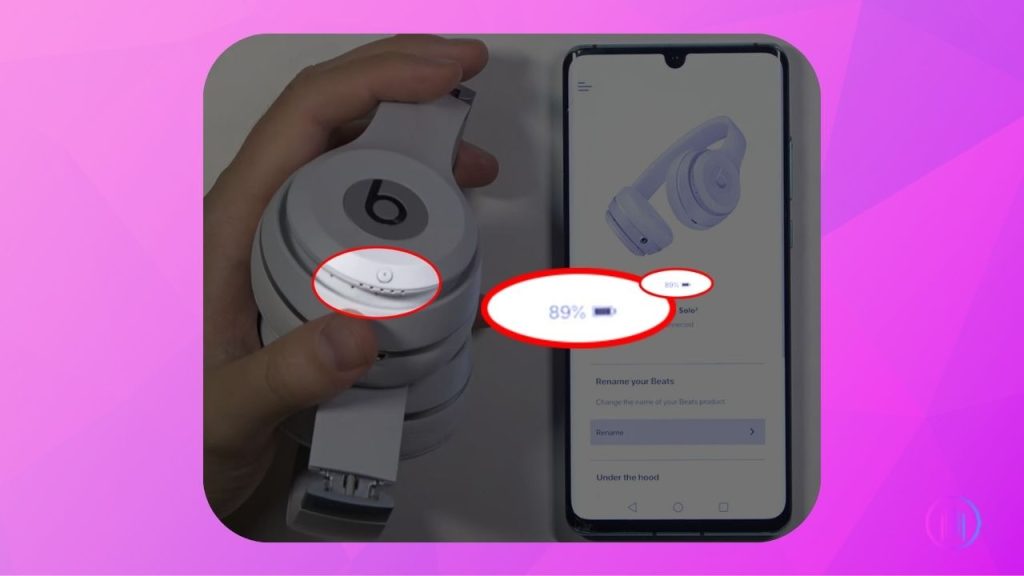
To ensure your Beats Solo 3 are sufficiently charged, connect them to a power source using the included USB cable. For a quick battery status check, you can utilize the Beats app on Android devices by pairing your headphones and selecting them from the list of connected devices within the app. This will display the current battery level on your screen. iPhone users have the added convenience of checking the battery level directly without the need for an app.
Additionally, the Beats Solo 3 feature a Fuel Gauge/LED indicator that provides an immediate visual cue of the battery status. A simple tap on the power button for a second will reveal the current charge level. Should the Fuel Gauge flash red, it indicates that the headphones are critically low on charge and require immediate recharging to continue functioning. Keeping an eye on these indicators can help you avoid unexpected disruptions and ensure your Beats Solo 3 are always ready for use.
2. Resetting Beats Solo 3 Headphones:
If your Beats Solo 3 headphones are experiencing glitches or won’t turn on, a hard reset might be the solution. This process restores the headphones to their factory settings, clearing any software issues and disconnecting Bluetooth connections, giving your device a fresh start.
Steps to Reset:
- Make sure your headphones are not connected to the charger.
- Press and hold the power button and the volume down button simultaneously.
- Hold both buttons for about 10 seconds until the LED indicator flashes, indicating the reset is successful.
- Once you see the LED flash, release both buttons. Your headphones are now reset and ready for use.
3. Clearing a Blocked Power Button:
A common issue that might prevent your wireless headphones from turning on is a blocked or malfunctioning power button. Over time, the small gaps around the button can accumulate dirt, dust, and other particles, which may obstruct its movement and disrupt the connection with the internal circuitry.
To address a blocked power button, first inspect it for any visible signs of dirt or debris. Gently using a toothpick or a fine pin can be effective in dislodging any particles trapped around the button. Additionally, repeatedly pressing the power button can sometimes dislodge dust and dirt, restoring its functionality.
However, if the power button appears damaged or continues to malfunction despite cleaning, it may require professional attention. In such cases, consulting with a qualified technician or arranging for a repair service through Apple can ensure that the issue is resolved correctly and your headphones are restored to working order. Taking these steps can help maintain the reliability and longevity of your device.
4. Beats Solo 3 Battery Issues:
Battery longevity is a critical aspect of maintaining the performance of your Beats Solo 3 headphones. Over time, even the robust Lithium-ion batteries that power these devices can succumb to wear and tear, leading to a decline in their ability to hold a charge. This phenomenon, known as battery degradation, is a natural consequence of prolonged use and can significantly impact your headphones’ functionality, potentially necessitating a battery replacement.
Lithium-ion batteries, the type used in Beats Solo 3, are praised for their efficiency but are not immune to the effects of repeated charging cycles. Typically, after around 300 charge cycles, you might notice a drop in performance, indicating that the battery may need to be replaced to restore the headphones to their optimal operating condition.
If you find yourself in need of a battery replacement, it’s important to note that this service incurs a fee, as battery degradation due to normal use is not covered under the standard Apple Warranty. However, if you have AppleCare+ for your device, you might be eligible for a complimentary replacement, provided the battery’s capacity has fallen below 80% of its original specification. This policy ensures that your Beats Solo 3 can continue to deliver the high-quality sound experience they’re known for, even after extensive use.
5. Reviving an Over-Discharged Battery:
When your Beats Solo 3 headphones are not in use for extended periods, the lithium-ion battery may lose charge and become over-discharged, preventing the headphones from turning on. This is a common issue with rechargeable batteries, as they naturally deplete over time, even when not actively used.
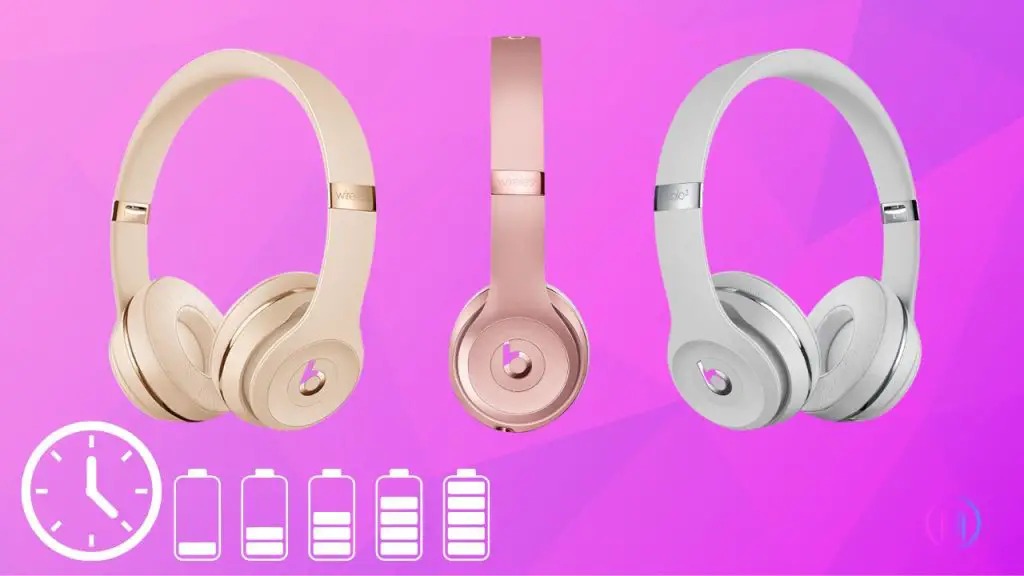
To address an over-discharged battery, it’s essential to give your Beats Solo 3 a substantial recharge. Connect your headphones to a power source and let them charge uninterrupted for at least 8 hours. During this charging process, you’ll notice the Fuel Gauge blinking to indicate that the battery is gradually regaining its charge. Once the battery is fully charged, the Fuel Gauge will display a solid light, signaling that the battery has reached 100% capacity and your headphones are ready to use again. This extended charging period helps rejuvenate the battery, ensuring your Beats Solo 3 turn on smoothly and function as expected.
6. Updating Your Beats Solo 3 Firmware:
Keeping your Beats Solo 3 headphones updated with the latest firmware is key to maintaining optimal performance. If your headphones are functioning but not delivering the best performance, or if they are not turning on at all, a firmware update could resolve these issues. Especially if your headphones were working fine previously, checking for firmware issues is a good step in troubleshooting.
If your headphones won’t turn on, attempting a firmware update can be a useful troubleshooting step. Start by ensuring they’re charged and then try the steps below to update the firmware. If the headphones remain unresponsive, the issue might be hardware-related, requiring professional assistance.
For iPhone, iPad, or Mac Users:
- Make sure your Beats Solo 3 are within Bluetooth range of your iPhone, iPad, or Mac, and connected to Wi-Fi.
- Your Beats Solo 3 should automatically update the firmware when connected to your Apple device via Bluetooth and Wi-Fi.
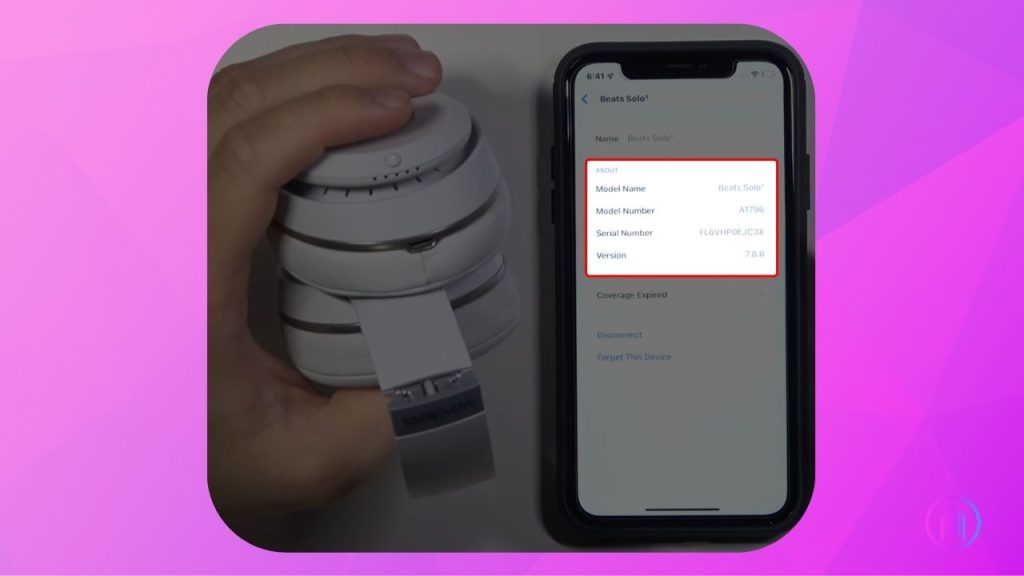
- To verify the update, connect your Beats Solo 3 to a charger and turn them on. Then, on your iPhone or iPad, go to
Settings>Bluetooth. Find your Beats Solo 3 in the list and tap the info button next to them. Scroll down to theAboutsection to check the firmware version.
For Android Users:
- Ensure you have the Beats app installed on your Android device.
- Open the Beats app and connect your Beats Solo 3 headphones.
- Within the app, check for any available firmware updates for your headphones and follow the prompts to install.
7. Checking Beats Solo 3 for Hardware Damage:
If your Beats Solo 3 headphones aren’t turning on, it might be due to hardware problems like a damaged circuit board. This kind of issue often happens after the headphones have been dropped, gotten wet, or just worn out over time. Even though you can’t see inside to check the circuit board, if the headphones stop working after a fall or contact with water, it could be the cause. For these situations, it’s best to get help from professionals who know how to fix these delicate parts safely. They have the right tools and experience to diagnose and repair the problem, helping your headphones work like new again.
Contact Apple Customer Support
Reaching out to Apple Customer Support is your best bet for fixing the problem with your device. They offer expert advice and can guide you through scheduling a repair service tailored to your needs. Their team is well-equipped to handle any issues, ensuring your device gets the attention it deserves for a swift and efficient resolution. Trust in their professional service to bring your device back to its optimal performance.
Conclusion
Fixing your Beats Solo 3 headphones when they refuse to power on doesn’t have to be a daunting task. Starting with the basics like ensuring they’re charged and cleaning them, to more advanced steps like software resets and firmware updates, you can often find a solution without needing professional help. Remember, regular maintenance and updates can prevent many issues. However, if you’ve tried everything and your headphones still won’t work, it might be time to reach out to a professional. Keeping your Beats Solo 3 in good shape means you can enjoy your favorite sounds without unexpected interruptions.
FAQs
If your Beats headphones won’t turn on despite showing partial charge, try this troubleshooting step: Place your headphones on the charger, then press and hold the power button for 20 seconds. Afterward, unplug the headphones and try turning them on. This reset can sometimes resolve the issue and get your headphones working again.
Random disconnections and blinking lights could indicate a software glitch or hardware malfunction. Start by attempting a factory reset: Press and hold the power button and the volume down button simultaneously for about 10 seconds. If this doesn’t resolve the issue, it’s advisable to seek professional help, as the problem might be hardware related.
Sudden malfunctions without a clear cause can be particularly frustrating. The first step is to try basic troubleshooting, such as charging the headphones fully and performing a factory reset. If these steps don’t work, the issue might be more serious, possibly hardware-related. In such cases, professional diagnosis and repair are recommended.
When faced with high repair costs for out-of-warranty Beats headphones, you might consider comparing the cost of repair with the price of a new or refurbished pair. Sometimes, purchasing new headphones can be more cost-effective than paying for repairs, especially if you find a good deal online.
If you’re worried that your headphones might not be working at all, a simple test can help clarify the situation. Try connecting your headphones to your device using an AUX cable. If they operate normally when connected this way, the problem might not be with the headphones themselves but could be related to the battery, Bluetooth connection, or another aspect. This test helps isolate the issue, indicating that the internal speakers are still in working condition.

I’m Shaun Conroy, an audiophile & founder of HiFi Audios. Holding a Bachelor’s in Sound Engineering, I bring deep expertise in audio devices and offer insights & recommendations to fellow enthusiasts.