
Facing issues with one of your Galaxy Buds not working can be incredibly frustrating, particularly when you’re ready to dive into your favorite tunes or need to take an important call. This predicament often leaves many wondering why their go to audio companion has suddenly let them down. If the left Galaxy Bud has stopped functioning, you’re not alone. This guide aims to unravel the mystery behind this common problem and provide you with easy-to-follow solutions to get your earbuds back in action. From quick fixes to more detailed troubleshooting steps, we’ll walk you through each process, ensuring your Galaxy Buds perform at their best. Let’s embark on this journey to restore your audio experience and ensure your Galaxy Buds are as reliable as ever.
Key Takeaways:
- Each Galaxy Bud needs to be charged individually to ensure both function correctly, preventing issues arising from one Bud being less charged than the other.
- Using the Galaxy Wearable app to adjust the sound balance between the two earbuds can resolve complaints about one earbud not working.
- When using a new earbud, it’s crucial to properly pair it with the existing one to ensure they deliver the best performance together.
- Regular cleaning of the Galaxy Buds and their charging case is essential to avoid any dirt or dust that could affect sound quality or charging capabilities.
- Keeping the earbuds’ software up to date is necessary to address any sound or connectivity issues, allowing for uninterrupted use of the earbuds.
- Regularly checking the connection between your Galaxy Buds and the paired device can preempt issues related to audio drops or one Bud not engaging.
- Being mindful of the touch sensors on each Bud is key, as improper handling can lead to unintended commands or disruptions in functionality.
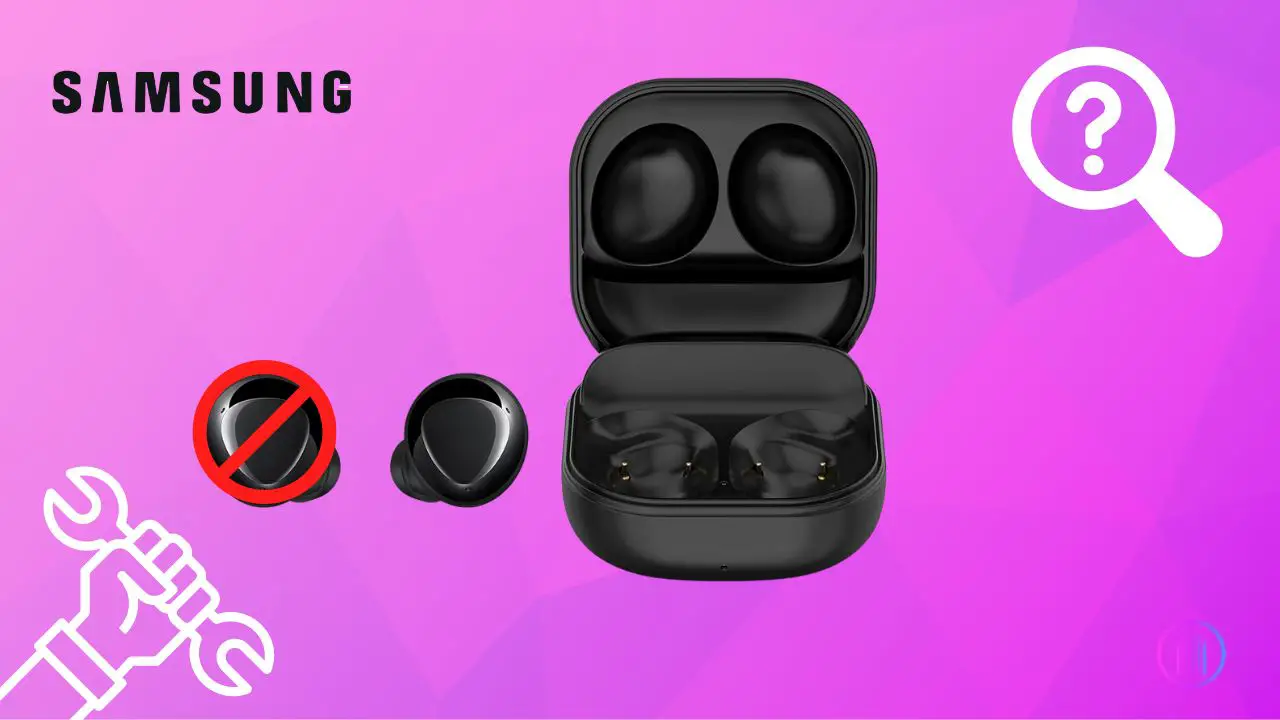
Fixing Left Galaxy Bud Not Working Issues
Fixing Left Galaxy Bud Not Working Issues involves a series of straightforward troubleshooting methods aimed at resolving common problems that prevent the left earbud from functioning properly. These steps range from ensuring a full charge to more technical solutions like resetting and updating the earbud’s firmware, designed to restore optimal audio performance.
1. Ensuring Your Galaxy Buds Are Fully Charged:
Ensuring your Galaxy Buds are fully charged is crucial for uninterrupted listening. Low battery power is often the reason behind an unresponsive Galaxy Bud. Each earbud contains its own battery, which can deplete at different rates. This disparity can lead to one bud losing power faster, resulting in audio interruptions or complete shutdown.
It’s important to note that although the earbuds share a charging case, they occupy individual charging slots. Occasionally, one slot may not function as intended, preventing an earbud from charging properly or receiving enough power. To mitigate this, regularly charging your Galaxy Buds is essential. Make sure to position the earbuds correctly in their respective slots and securely close the case lid to ensure optimal charging. This simple step can significantly enhance your Galaxy Buds’ performance and reliability.
2. Restarting Your Galaxy Buds:
Occasionally, your Galaxy Buds may encounter connectivity issues, leading to one of the earbuds not functioning as expected. A simple yet effective way to address this is by restarting your Galaxy Buds. This process can refresh the connection and potentially resolve any minor glitches you’re experiencing. Here’s a step-by-step guide to effectively restart your Galaxy Buds:
- Gently place the Buds back into their charging case, ensuring proper alignment for charging contacts.
- Close the lid of the case securely and wait for about 6-10 seconds. You’ll notice the indicator light on the case will initially illuminate and then go out, signaling a reset in process.
- After waiting, open the charging case lid. This action prompts the earbuds to enter pairing mode, making them ready to reconnect with your device.
- To ensure a clean slate for connectivity, consider restarting your smartphone or the device you’re pairing the Buds with.
- Once your phone restarts, attempt to pair the Galaxy Buds again and check if the issue with the malfunctioning earbud has been resolved.
3. Resetting Your Galaxy Buds:
Resetting your Galaxy Buds can often resolve issues that aren’t fixed by simpler troubleshooting steps. This process refreshes your Buds’ system, potentially clearing any glitches or software hiccups. Here’s a step-by-step guide to effectively reset your Galaxy Buds:
- Start by placing your Galaxy Buds securely into their charging case. Ensure they’re properly seated so the charging contacts align.
- Keep the lid of the charging case open; this is crucial for the reset process.
- Next, open the Samsung Wearable app on your smartphone. This app is your control center for managing and troubleshooting your Galaxy Buds.
- Within the app, navigate to the ‘About earbuds’ section. This area provides you with detailed information and settings for your Buds.
- Look for the ‘Reset’ option and tap on it. This action initiates the reset process, but to prevent accidental resets, the app will ask for confirmation.
- Confirm your choice by tapping ‘Reset’ again. This will start the resetting process, which may take a few moments.
To reset your Samsung Galaxy earbuds without using the app, simply hold the touch sensors on each earbud for at least 10 seconds until you hear a chime. This indicates the earbuds have reset. After this, place them back in the charging case for about 30 seconds before trying to pair them with your device again. This method works for various models and is a quick fix for common earbud issues.
For the Gear IconX model, you can reset the earbuds by locating the reset button under the rubber wing tip. Press this button with a SIM card ejector tool or a paperclip for about 7 seconds, release, and then press again for 3 seconds until the LED flashes, signaling a successful reset. Remember to reattach the rubber wing tip before pairing the earbuds with your device again.
After the reset, your Galaxy Buds will return to their original settings, akin to when you first used them. This can often resolve persistent issues, allowing you to enjoy a seamless audio experience once again.
4. Update Your Galaxy Buds Firmware:
At times, one of your Galaxy Buds may stop functioning properly,and this could be due to outdated firmware. Both earbuds rely on regular software updates to maintain their best performance. Neglecting these updates can lead to various issues, including unresponsiveness or malfunctioning of the earbuds.
To resolve firmware-related problems and ensure your Galaxy Buds operate smoothly, it’s crucial to keep their software up-to-date. Thankfully, this process is straightforward with the help of the Galaxy Wearable app. Here’s a simple guide to updating your Galaxy Buds firmware:
- Open the Galaxy Wearable app on your smartphone or tablet.
- Navigate to ‘Earbuds settings’ within the app.
- Select ‘Earbuds software update’ to check for available updates.
- If an update is available, the app will prompt you. Simply tap ‘Update’ to start the installation process.
5. Reconnecting Your Galaxy Buds:
If your left Galaxy Bud is still silent, reconnecting it to your device might just do the trick. Here’s a straightforward guide to help you through the process:
Unpairing and Re-pairing:
- Start by accessing the Bluetooth settings on your smart device. Look for your Galaxy Buds in the list of paired devices and choose to ‘Delete’, ‘Unpair’, or ‘Forget’ them to initiate the disconnection.
- Next, prepare your Galaxy Buds for a fresh connection. Place them back in their charging case and close the lid. After waiting for about 6 to 10 seconds, open the case again. This short wait helps reset their connection status.
- Now, it’s time to re-establish the connection. Ensure Bluetooth is activated on your smart device. Bring the earbuds close to your phone or tablet to facilitate a smooth pairing process. Follow your device’s prompts to pair the earbuds once again and check if the audio issue with the left Galaxy Bud has been resolved.
Resetting Bluetooth Settings:
Sometimes, a simple reset of your device’s Bluetooth settings can clear up any connectivity hiccups. Here’s how:
- Navigate to the Bluetooth settings on your phone or tablet. You’ll find an option to turn off Bluetooth. Tap the slider to switch it off, wait for a few moments, then toggle it back on.
- Bring your Galaxy Buds closer to your device. This ensures a strong connection. Test the audio in your left Galaxy Bud to see if the problem has been fixed.
6. Clean your Galaxy Buds:
Ensuring your Galaxy Buds remain clean is crucial for maintaining their sound quality and charging capabilities. Over time, your Galaxy Buds might accumulate dirt and earwax, which can lead to one or both buds functioning poorly. This might result in muffled sound or complete silence from the affected bud. Additionally, the buildup of debris can interfere with the charging process, preventing the buds from charging properly.
To tackle this, a careful cleaning routine is necessary:
- Start by gently removing the rubber tip from the earbud to expose the speaker mesh and the inner surface.
- Use a cotton swab to delicately clean the mesh and the area under the rubber tip. This helps in dislodging any dirt or earwax without pushing it further into the earbud.
- With a soft, dry cloth or brush, gently wipe away any remaining debris from inside the rubber tip and the earbud’s surface.
- After cleaning, reattach the rubber tip to the earbud ensuring it fits securely.
- Lastly, don’t forget the charging case and the earbuds’ contacts. A cotton swab can be used to gently clean the charging contacts in the case and the sensors on the earbuds, ensuring a good connection for charging.
7. Adjusting Audio Balance:
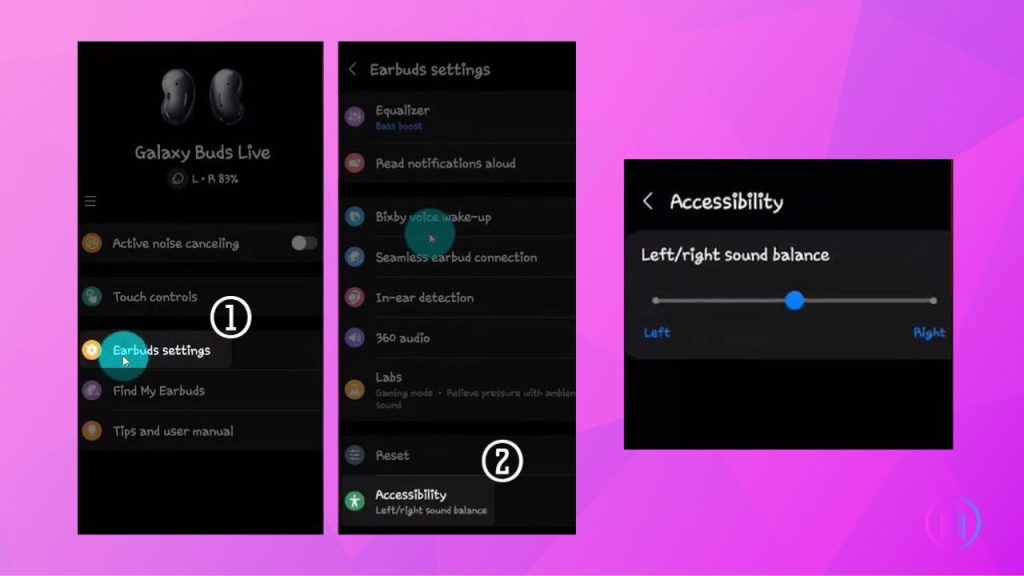
Sometimes, the issue with your left Galaxy Bud might stem from an audio imbalance, making it seem as though one bud isn’t working properly. This can be easily mistaken for a malfunction, but it’s often just a matter of adjusting the sound settings. The Galaxy Wearable app, designed for Samsung earbuds, provides a straightforward solution by allowing you to fine-tune the volume levels of each earbud individually.If you notice a discrepancy in sound output, it’s worth checking if the sound slider has been inadvertently adjusted too far to one side, which could silence the opposite earbud. Correcting this is simple and can restore your audio experience to its intended stereo balance.
To adjust the audio balance, follow these steps:
- Open the Galaxy Wearable app on your connected smartphone or tablet.
- Navigate to ‘Earbuds Settings’ and select ‘Accessibility’.
- Within the Accessibility menu, you’ll find the option for left/right sound balance. Here, a slider allows you to adjust the balance between the left and right earbuds.
- Move the slider until you find a balance that restores symmetry to your audio experience.
8. Syncing Your Galaxy Buds:
Experiencing issues with only one of your Galaxy Buds not working can often be a sign that the earbuds are out of sync. This mismatch can lead to one earbud appearing inactive. To resolve this, a reset to synchronize your Galaxy Buds is recommended, a process easily managed through the Galaxy Wearable app.
Samsung earbuds are designed to function as a pair, though individual use is possible. To enjoy the full stereo experience, both the left and right Galaxy Buds must be connected and in sync. Should one earbud fall out of sync, it may cease to function properly in tandem with its pair.
To re-establish this connection, follow these steps:
- Place both earbuds in their charging case.
- Firmly press and hold the touchpads on each earbud for 7-10 seconds.
- Release the touchpads when the battery indicator light flashes green, then returns to its original state.
9. Hardware Issues with Galaxy Bud:
When you’ve exhausted all troubleshooting steps without success, the issue might stem from a hardware problem with your left Galaxy Bud. Before concluding that your earbud is defective, inspect it closely for any signs of physical damage. This examination is crucial as it helps in understanding whether the problem is repairable or if you need a replacement.
In situations where repair seems unlikely or impractical, there’s a silver lining. Samsung offers the option to purchase just one Galaxy Bud, allowing for an economical solution to replace the damaged or malfunctioning earbud. This approach is not only cost-effective but also environmentally friendly, as it reduces waste.
Additional Troubleshooting Step for Left Galaxy Bud Not Working
Sometimes, the Galaxy Buds may not charge properly due to misalignment in the charging case, leading to one of the buds, particularly the left one, not working or responding. Here’s a method to ensure it starts charging:
- Make sure the charging case has enough power. A low battery in the case might not be able to charge the buds effectively.
- Place the left Galaxy Bud in the charging case. If the indicator light turns red and then quickly turns green or no light shows, the bud may not be positioned correctly.
- Gently reposition the left bud in the case. You might need to adjust its position multiple times. Look for the red light to stay on longer, indicating a proper connection.
- Continue to take the bud out and place it back in the charging case until the red light stays on for more than a few seconds. This indicates that the bud is finally charging.
- Once the red light stays on, indicating a proper charging connection, leave the bud in the case to charge for at least 30 minutes. This should give it enough power to turn on and reconnect to your device.
- After charging, take the bud out of the case and try to connect it to your device. If successful, the bud should be working again.
Contact Samsung Customer support
If your Galaxy Bud is facing issues that troubleshooting cannot resolve, reaching out to Samsung Customer Support is your next best step. They offer comprehensive assistance for hardware related problems. Notably, if your earbud is beyond repair, Samsung provides the convenience of purchasing a single Galaxy Bud to replace the damaged one. This service is particularly helpful in avoiding the cost of buying a new pair. For personalized support, consider visiting a Samsung repair center, where experts can assess and address your earbud’s specific needs efficiently.
Conclusion
Resolving issues with a non-functioning Galaxy Bud often involves simple steps like charging, resetting, or updating. Regular care ensures their longevity and optimal performance. If problems persist, Samsung’s Customer Support is a valuable resource. This guide aims to keep your audio experience seamless, so you can enjoy your music and calls without interruption. Good luck, and may your Galaxy Buds serve you well!

I’m Shaun Conroy, an audiophile & founder of HiFi Audios. Holding a Bachelor’s in Sound Engineering, I bring deep expertise in audio devices and offer insights & recommendations to fellow enthusiasts.