Setting up your Sonos speakers with WiFi might seem a bit tricky. It’s like having a great sound system ready to fill your home with music, but there’s a small challenge linking it to your WiFi. Especially when there’s a change in your WiFi details, like a new password or router, your Sonos needs to catch up and connect to the new settings. This guide is all about making that process easy for you. We’ll walk through it together, step by step, so your home can quickly become a place filled with your favorite sounds, without any complications. Let’s dive in and make sure your music never skips a beat.
Key Takeaways
- To connect Sonos speakers to a new Wi-Fi network, you need a phone or tablet that can download apps from the Apple Store or Google Play Store.
- First, connect your phone or tablet to the new Wi-Fi, then set up your Sonos devices.
- For certain devices, you have the option to use the Sonos S1 or S2 app. However, if your devices don’t work with the S2 app, stick to using the S1 app.
- If you keep the new Wi-Fi settings the same as the old Wi-Fi’s SSID and password, there’s no need to reconnect the Sonos system to your Wi-Fi, as it won’t notice any change.
- Connecting your Sonos system through a wired setup is less likely to face malfunctions, making it a safer option if you want to avoid connectivity issues.
1. Connecting Sonos to WiFi Using Wired Setup:

When you update your WiFi settings or switch routers, it’s essential to reconnect your Sonos system to maintain its functionality. Opting for a wired connection can significantly simplify this process. This involves directly linking one of your Sonos devices to the new router, which then facilitates the wireless connection of other speakers via the SonosNet network. If you’re aiming for a stable and reliable setup, especially with multiple Sonos devices, the Wired Connection via SonosNet is ideal, as it establishes a special network that connects all your speakers wirelessly. For those whose setup is straightforward and prefer to connect Sonos speakers directly to the WiFi network without extra steps, the Standard Setup Method is more suitable. Meanwhile, advanced users facing network range or stability issues, or those using a Sonos Boost device, might find the Boost Setup Method beneficial, as it helps create a dedicated network for Sonos speakers, ensuring an easy connection to the new network. Follow these steps to ensure a successful setup:
1. Wired Connection via SonosNet:
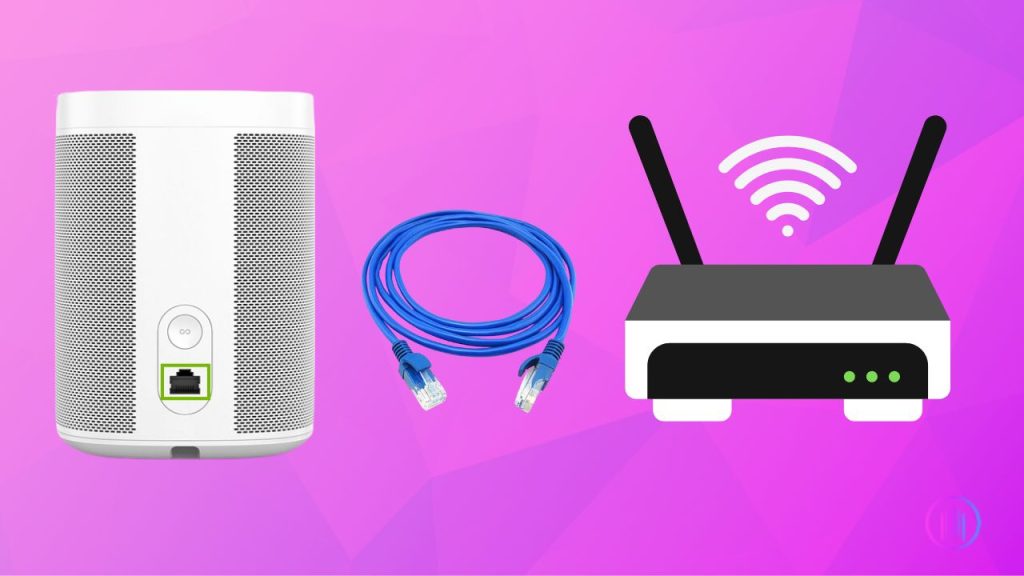
- Ensure that both your Sonos speaker (with an Ethernet port) and the new router are powered on. Have an Ethernet cable handy for this procedure.
- Connect the chosen Sonos speaker to your new router using the Ethernet cable. This action will automatically initiate the SonosNet network, a proprietary wireless network that provides a stable connection for your Sonos system.
- After connecting the speaker to the router, turn on the rest of your Sonos devices. They should automatically connect to the SonosNet network broadcasted by the wired speaker. You can verify this by checking the Rooms list in your Sonos app, where all powered and connected devices should be visible.
- If any Sonos device doesn’t show up in the app, try restarting it (except the one connected via Ethernet). This often resolves recognition issues. It’s important to note that portable Sonos speakers, such as the Sonos Roam and Move, do not support SonosNet and must be connected through the standard wireless setup process.
2. Standard Setup Method:
For Sonos users with a standard setup, where speakers connect directly to the WiFi network, follow these steps to reconnect your system after a network change:
- Temporarily connect one of your Sonos devices, such as a Play:1, to your router using an Ethernet cable. This step ensures the device appears in the Sonos app.
- Open the Sonos app and navigate to ‘Settings’ > ‘System’ > ‘Network’ > ‘Networks’ > ‘Update Networks’. Follow the app’s instructions to enter your new WiFi details.
- Once your Sonos device has been updated with the new WiFi settings, disconnect the Ethernet cable. Your device should now be able to connect to the WiFi network wirelessly.
3. Boost Setup Method:
For those using a Boost setup, which involves a Sonos device like the Sonos Boost connected directly to the router, creating a dedicated network for your Sonos speakers, here’s how to reconnect after changing your network:
- If you’ve changed routers, connect your Sonos Boost to the new router using an Ethernet cable. This re-establishes the dedicated Sonos network.
- If other Sonos devices are not connecting due to the network change, power cycle them by unplugging each one for a few seconds and then plugging them back in.
- After rebooting, ensure each Sonos device shows a solid white light, indicating they are connected to the Boost’s network. They should now appear in the Sonos app and function normally on the new network.
2. Connecting Sonos to WiFi Using Wireless Setup:

Setting up your Sonos speaker with a wireless connection offers freedom and flexibility in how you position and use your speakers. While wireless setups might seem daunting due
to potential connectivity issues, following these clear steps will ensure your Sonos system is up and running smoothly on your WiFi network. It’s important to check that your Sonos devices are compatible with your WiFi network to avoid any hiccups.Follow these steps to ensure a successful setup:
Using Sonos S2 App:
- Download and install the Sonos app on your Android or iOS device from the Apple App Store or Google Play Store if you haven’t already.
- Ensure your smartphone or tablet is connected to the WiFi network you wish to use with your Sonos speaker.
- Connect your Sonos speaker to power and wait for the indicator light to signal it’s ready.
- Open the Sonos app. If it’s your first time connecting to this WiFi network, you might see a prompt like “Unable to connect to Sonos. Let’s fix it.” Follow the prompt to begin the setup.
- In the app, navigate to Settings and look for a notification related to network issues. Select the option to update your network settings.
- Confirm that all Sonos devices are powered on and tap ‘Find system’ to allow the app to search for your devices.
- The app will list nearby Sonos devices. Choose the one you wish to connect, ideally the one closest to your router for optimal connectivity.
- Once selected, wait for the app to connect to the device. You’ll hear a chime from the speaker, and its LED might flash white and green, indicating it’s ready for the next step.
- On your selected speaker, press the Join button. This could be marked with an infinity symbol on newer models or represented by the play/pause or mute buttons on older versions.
- Enter your WiFi network’s password when prompted by the app and wait for the connection to establish.
- Once connected, the app will verify that your Sonos devices now recognize your Wi-Fi network as trusted. Tap ‘Done’ to complete the setup.
- Your speaker will synchronize with other Sonos devices in your home, transferring them to the new WiFi network. Restart any device not automatically connecting.
Legacy Sonos Devices and the S1 App:
To connect legacy Sonos devices using the S1 app, simply tap the notification that says “Unable to connect to Sonos, Learn More.” Then, choose “Change router or Wi-Fi settings?” This will prompt the app to guide you through the necessary steps, including entering your Wi-Fi password, to complete the connection. This streamlined process ensures your older Sonos models remain seamlessly integrated with your home audio setup, allowing you to enjoy uninterrupted music streaming.
Fixing Connectivity Issues
If you’re facing WiFi connectivity issues with your Sonos speakers, don’t worry. The steps I’m about to share with you are designed to help tackle common problems, making your connection smoother and more reliable.
- If your speakers do not connect to the new network, you may need to reboot them. Unplug each speaker for 10 seconds and then plug them back in. Wait a few seconds for them to reconnect to the new network.
- Move your Sonos speaker closer to your WiFi router to ensure a strong signal.
- For those using a wired connection, ensure all Ethernet cable connections are secure.
- Ensure your Sonos app (whether S1 or S2) is updated to the latest version for optimal performance.
- If you have a dualband router (2.4 GHz and 5 GHz), consider connecting to the 2.4 GHz band for a more extended range, as it may provide a more stable connection for your Sonos products.
- If your Sonos setup is wired, ensure your speaker is connected via Ethernet cable to the new router. Follow the in app instructions to set up the speaker on the new network.
- If you use a Sonos Boost, connect it via Ethernet to your new router. You may need to reboot speakers connected to the Boost by unplugging them for 10 seconds and then plugging them back in.Verify that your WiFi network is stable and that the correct password has been entered.
Factory Resetting Sonos Speakers:
Factory resetting Sonos speakers should be considered as a last resort or if you’re planning to sell your speaker. It erases all data including registration information and saved content.
- For most Sonos products, except Move, Roam, and Roam SL, press and hold the join button (or play/pause button on older models) while plugging the speaker back in. Wait for the light to flash orange and white, then green, indicating the speaker is ready to be set up again.
- For Sonos Move, power off the speaker, then hold the join button and press the power button. Wait for the light to flash orange and white, then green.
- For Sonos Roam or Roam SL, power off the speaker, hold the play/pause button, and press the power button. Wait for the light to flash orange and white, then green.
Conclusion
Setting up your Sonos speakers for WiFi connectivity is simpler than it might seem. With the guidance provided, you’re well on your way to tapping into the full potential of Sonos’s superior audio experience. Known for its crisp, clear sound that can fill any room, Sonos transforms your living space into a concert hall or a cozy music nook, depending on your mood. By following these steps, you’ll ensure that your home becomes a sanctuary of sound. Here’s to endless days and nights of music that moves you, crafted by the innovation of Sonos.
FAQs
No, you should not disable WiFi on your Sonos speakers, even if one is connected via Ethernet. Disabling WiFi can lead to issues with surround sound functionality and subwoofer connections, as these components rely on WiFi to communicate within your Sonos system.
To verify if your Sonos system has switched to SonosNet, open the Sonos app, go to Settings > System > About My System. Look for “WM:0” next to your speakers, indicating they are on SonosNet. If you see “WM:3”, your speakers are still using your home WiFi network.
In the Sonos app, “WM:0” indicates that your Sonos devices are connected via SonosNet, a dedicated wireless network created by Sonos to improve performance. “WM:3” means your devices are connected through your home WiFi network.
It is not necessary to wire all your Sonos speakers. Connecting one speaker to the Ethernet will create SonosNet, allowing other speakers to benefit from a more stable wireless network. However, wiring can be beneficial in complex network environments or for professional setups.
If you encounter connectivity issues, ensure your wired speaker’s WiFi is not disabled, as this could disrupt SonosNet functionality. Check all Ethernet connections are secure, and consider restarting your Sonos system and router to refresh the network.
Yes, disabling WiFi on your main home theater speaker, such as the Sonos Arc, can disrupt communication with surround speakers and subwoofers. These devices rely on a private 5GHz network created by the main speaker for seamless audio synchronization.
If you need to delete a Wi-Fi network from your SONOS system, it’s quite straightforward. Open your SONOS application, and navigate to the ‘Settings’ menu. From there, proceed to ‘System’ > ‘Network’ > ‘Wi-Fi Networks’. You’ll see a list of saved networks. Simply find the one you wish to forget and tap on ‘Forget this Network’. This action will remove the selected network from your SONOS system, ensuring it no longer connects automatically.

I’m Shaun Conroy, an audiophile & founder of HiFi Audios. Holding a Bachelor’s in Sound Engineering, I bring deep expertise in audio devices and offer insights & recommendations to fellow enthusiasts.


