
Facing trouble with your JLAB earbuds not charging? It’s a common hiccup that can throw a wrench into your daily groove, turning what should be a seamless experience into a frustrating ordeal. This guide is here to flip the script. With a step by step approach, we’ll dive into the heart of the issue, offering clear, easy to follow solutions to get your tunes back on track without a hitch. From a deep clean to tech tweaks, we’re covering all bases to ensure your listening sessions are as uninterrupted and enjoyable as they were meant to be. Let’s embark on this troubleshooting journey together, and restore the harmony between your earbuds and their charger.
KEY TAKEAWAYS
- Dust or debris on the earbuds or charging case can prevent a proper connection; ensure both are clean for optimal charging.
- Loose or misaligned earbuds in the charging case can disrupt charging; ensure they are correctly seated and connected to the charging pins.
- Outdated firmware can lead to charging issues; regularly update your earbuds’ firmware through the JLab app to ensure smooth operation.
- Software glitches can affect charging; resetting your JLab earbuds to factory settings can help resolve these issues.
- Deeply discharged batteries might not charge immediately; leave the earbuds in the charging case for an extended period to allow them to recover.
- Physical or water damage can impair charging capabilities; visually inspect your earbuds for any signs of damage.
- Charging can be affected by extreme temperatures; ensure your earbuds and case are within a normal temperature range before charging.
Solving JLAB Earbuds Not Charging Issues
If your JLAB earbuds aren’t charging, there’s no need to panic. We have simple, direct solutions to help you tackle the issue. From a quick cleanup to power source checks, these steps will get your music back on track in no time.
1. Cleaning Charging Pins and Case:
Ensuring a reliable connection for your JLAB earbuds involves more than just a superficial clean. Initially, inspect the charging case and earbuds for any protective films or stickers. These are often applied during packaging to separate the charging pins from the case and might be overlooked. If present, carefully remove them to establish a clear path for charging.
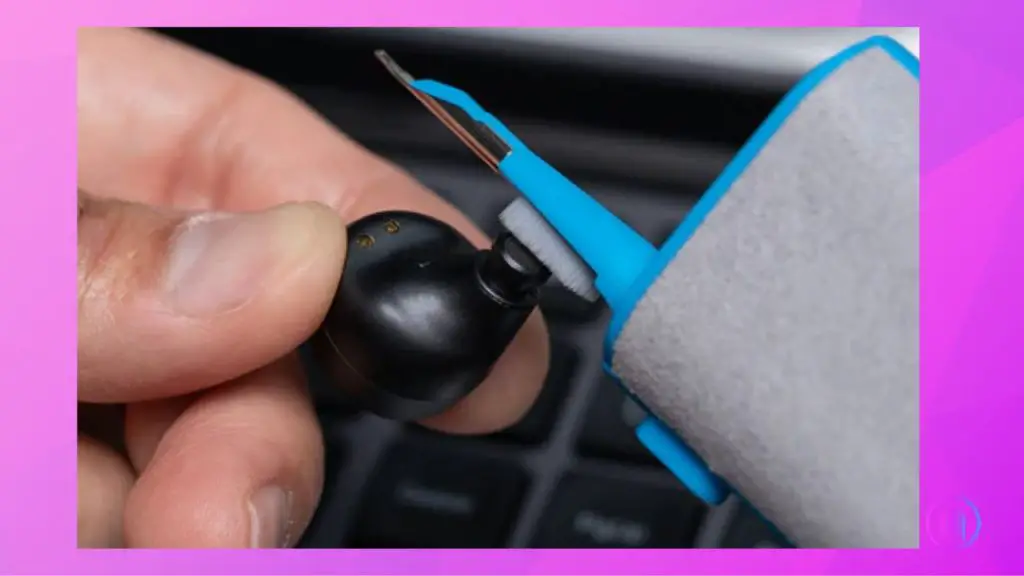
Over time, and with regular use, your earbuds may accumulate earwax or other residues, particularly around the charging pins. Such buildup can impede the charging process. To tackle this, gently clean both the earbuds and the charging case using a soft, lint free cloth or a soft bristled brush. For more stubborn deposits, a small amount of WD-40 contact spray can be applied sparingly to a cotton swab and used to carefully clean the charging contacts. This not only cleans but can also improve the electrical connection. Ensure everything is fully dry before attempting to charge again.
This thorough cleaning routine not only enhances the charging efficiency of your earbuds but also extends their lifespan by maintaining optimal contact between the earbuds and the charging case.
2. Inspecting Cable, Power Source, and Charging Case Connections:
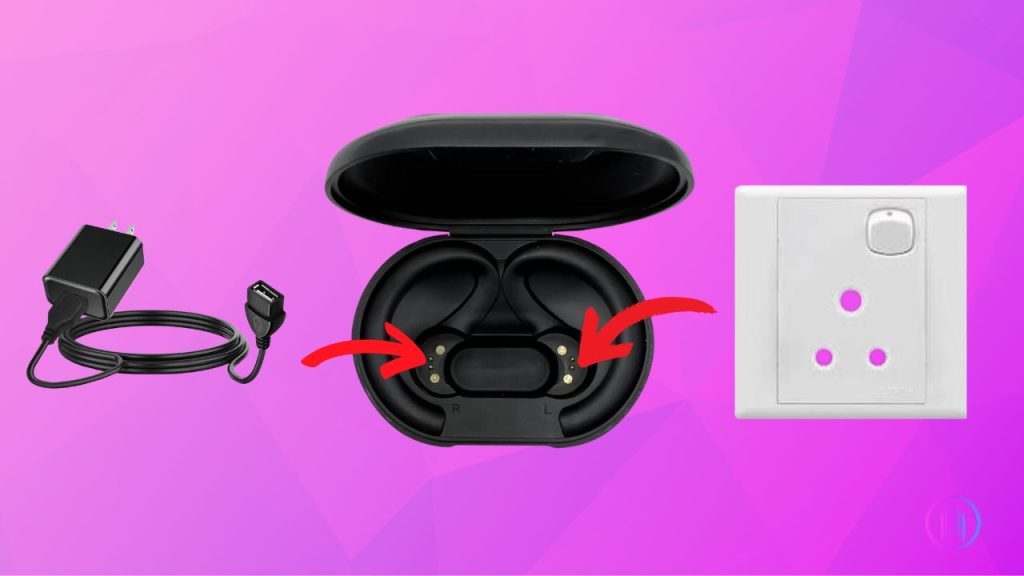
Before attributing charging issues to the cable or power source, it’s essential to inspect the charging case’s slots. Inside these slots are tiny metal pins that supply power to the earbuds when they are being charged. A common issue is a loose connection between the earbuds and these pins. Make sure each earbud is properly placed in its slot in the charging case and is touching the metal connectors.
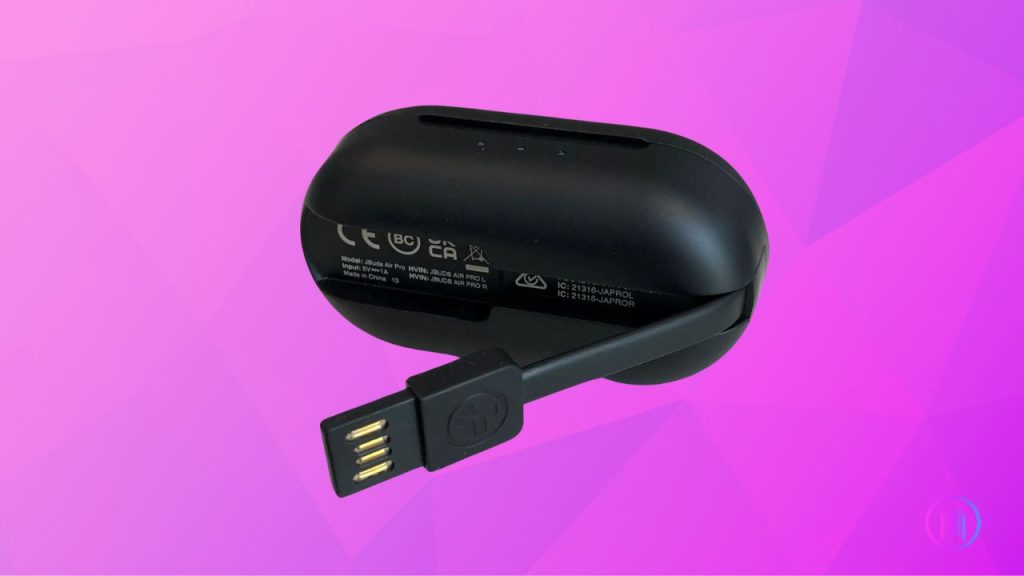
Next, consider the possibility of a faulty charging cable. If the earbuds fail to charge, try using an alternative USB cable to confirm whether the original cable is defective. For JLAB earbuds models with non detachable cables, a damaged cable complicates matters. In such cases, you may need to either open the case to replace the cable or consider purchasing a new charging case.
Additionally, it’s advisable to verify the power output of your chosen power outlet with a voltmeter. An inconsistent or inadequate power supply can prevent the earbuds from charging correctly. You can also test the outlet by charging another device or by trying to charge the earbuds using a different outlet.
3. Updating Your Earbuds Firmware:
Keeping your JLAB earbuds’ firmware up to date is crucial for ensuring they function at their best, especially when it comes to fixing charging issues. Firmware updates can resolve various software glitches and bugs that may hinder your earbuds’ charging capability. The process is straightforward with the JLAB companion app, which you’ll need to download to your smartphone if you haven’t already.
While most JLAB earbuds models don’t require frequent firmware updates, some, such as the Jbuds Air Pro, Epic Air Sport ANC, Jbuds Air ANC, and Epic Air ANC, do need regular updates to iron out minor issues and enhance performance. Neglecting these updates can lead to problems not just with charging, but also with pairing and sound quality.
To update your JLAB earbuds’ firmware, follow these simple steps:
- Install the right JLAB app for your earbuds on your phone.
- Connect your earbuds to your smartphone.
- Launch the app and go to ‘My Devices.’
- Select your earbuds from the list.
- Tap on ‘Updates.’ The app will check for available firmware updates and notify you if any are available.
- If an update is available, follow the on screen instructions to install it. If your earbuds are already up to date, you’ll see a message confirming this.

Regularly checking for and installing firmware updates ensures your earbuds remain in peak condition, minimizing issues and maximizing your listening experience.
4. Resetting Your JLAB Earbuds:
Resetting JLAB Earbuds can fix charging issues caused by software problems or incorrect settings. This straightforward solution restores earbuds to default, resolving technical glitches effectively.
Here’s a simplified guide to resetting your JLAB earbuds:
- Begin by disconnecting your earbuds from all paired devices. In your device’s Bluetooth settings, select your JLAB earbuds and choose to “Forget” or “Unpair” them.
- Place both earbuds back into their charging case. To start the reset process, locate the touch sensor on each earbud. Depending on your JLAB model, you’ll need to tap the sensor on each earbud either four or seven times rapidly. Watch for the LED on each earbud to blink blue four times, indicating a successful reset input.
- After tapping, wait a moment and then take the earbuds out of the case. You should notice one earbud blinking blue and white, while the other shows a solid white light. This signals that the earbuds have been reset and are now in pairing mode, ready to be connected to your device anew.
This reset process not only aims to fix charging issues but can also help with other technical glitches related to your earbuds’ personalized settings. By restoring your earbuds to their original state, you can often overcome charging problems and enjoy your music without interruption.
5. Addressing Battery Depletion:
To address battery depletion in JLAB earbuds, initially try extended charging by placing them in their dock for 8-12 hours, which could gradually recharge deeply discharged batteries, even if no charging indicators appear. If unsuccessful, a manual jump start with a AA 1.5V battery and copper wires might be attempted to directly charge the earbuds terminals. However, exercise caution with this method, as it involves significant risk and could damage the earbuds if not done properly. Prevent future issues by regularly charging the earbuds, maintaining their battery health and readiness.
6. Checking Earbuds and Case Temperature:
JLAB earbuds often face charging issues due to temperature. They use lithium-ion batteries which need a certain temperature range to charge properly. If it’s too hot or too cold, charging stops to protect the battery’s inner workings.
- Lithium-ion batteries, like those in JLAB earbuds, are sensitive to extreme temperatures. Charging outside the recommended temperature range can harm the battery cells permanently.
- The earbuds’ charging circuits include safety mechanisms that stop charging if the temperature is too high or too low. This is a protective measure to maintain the battery’s lifespan and efficiency.
- The temperature of the earbuds’ case is a crucial factor. If the case is overly warm, perhaps from extended use, or too cold, maybe from exposure to winter conditions, it can affect charging. You can gauge the case’s temperature by holding it. If it feels unusually hot or cold, it’s outside the ideal charging range.
- Before attempting to charge your earbuds again, ensure the case’s temperature is back to normal. This can be done by simply removing the case from any power source and gently holding it in your hands until it feels neither too hot nor too cold to the touch.
7. Checking for Physical Damage:
In the quest to resolve charging challenges with JLab earbuds, a thorough inspection for physical damage is indispensable. Damage can arise from various sources, significantly affecting the earbuds’ ability to charge.
- Water Exposure: One frequent culprit is water damage. Moisture can lead to corrosion within the earbuds, damaging internal circuits and the battery, ultimately hindering the charging process.
- Impact Trauma: Accidental drops or impacts can also compromise the earbuds. Such incidents might damage vital components like the battery or charging port, obstructing proper charging.
- Visible Damage Checks: It’s essential to scrutinize the earbuds for any cracks, deformities, or signs of damage. Pay particular attention to the charging pins, ensuring they are intact and unaltered.
- Environmental Factors: Beyond water and impact, the earbuds might suffer from extended wear, exposure to extreme temperatures, or corrosive chemicals. Look out for discoloration, melting, or unusual physical changes that suggest damage.
- Charging Case Considerations: The charging case plays a pivotal role in keeping the earbuds powered. A defective case can render charging impossible. Unfortunately, the case lacks user repairable parts, making professional repair a potentially costly option. In many cases, acquiring a new charging case from the JLab website might be the most practical solution.
8. Contacting JLab Customer Support:
When you’re having trouble with your JLab earbuds and can’t fix them with the tips provided, remember that JLab offers a unique service: the option to replace just the part you need, like a single earbud or the charging case. This is quite rare in the earbud market and very handy if you lose or damage one piece. You can easily find and order the exact replacement part for your model on the JLab Replacement Parts page. If these steps still don’t solve your charging issues, it’s a good idea to contact JLab Customer Support, especially if your earbuds are still under warranty. They’re there to help make sure you can get back to enjoying your music as soon as possible.
Conclusion
Dealing with charging problems in JLAB Earbuds often involves straightforward actions such as cleaning the charging areas or changing the power source. If these initial steps don’t solve the issue, it might be necessary to look into hardware replacements or reach out to customer support for help. By following these guidelines, you can effectively tackle the problem and quickly get back to enjoying your music without much hassle. Wishing you the best of luck and hoping your earbuds provide you with many more hours of enjoyable listening.

I’m Shaun Conroy, an audiophile & founder of HiFi Audios. Holding a Bachelor’s in Sound Engineering, I bring deep expertise in audio devices and offer insights & recommendations to fellow enthusiasts.